The most important thing about the belay is that you must never let go of the passive end of the rope with your braking hand (i.e. the hand that holds the rope under the brake).
Paradoxically, many climbing accidents occur to experienced climbers. The most common causes are lack of communication and lack of attention. Watch the person you are belaying and use the accepted commands to reduce the risk of incidents.
Top rope securing
This is the most important part of the induction course. You, as the belayer, are responsible for the climber's safety. With a well and correctly practiced belay technique, the climber can feel safe and you can relax and concentrate on the climber instead of having your eyes on the brake all the time.
You should practice the belay procedure under the supervision of a trained instructor until you feel completely confident in its execution. If the climber falls and you are unable to belay properly, a serious accident may occur. Never compromise on safety.
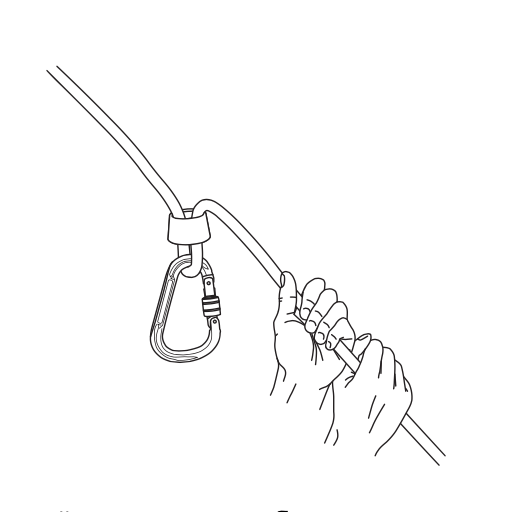
There must always be a hand on the rope under the brake. If in any situation you feel unsure of what you are doing, lock the rope with your brake hand on your hip as in figure 3. In this position the climber is safe and you can ask someone for help or continue with the belay again when you feel ready.
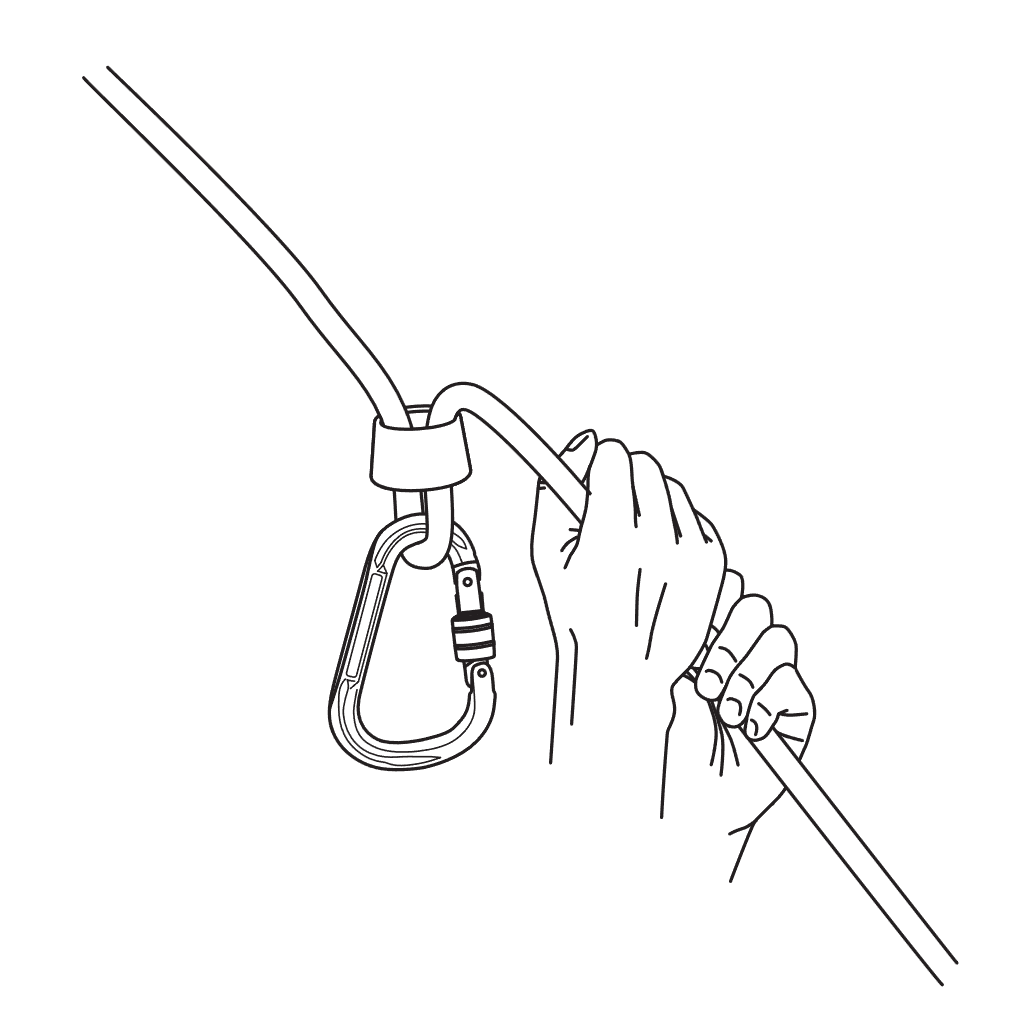
Top rope securing step by step
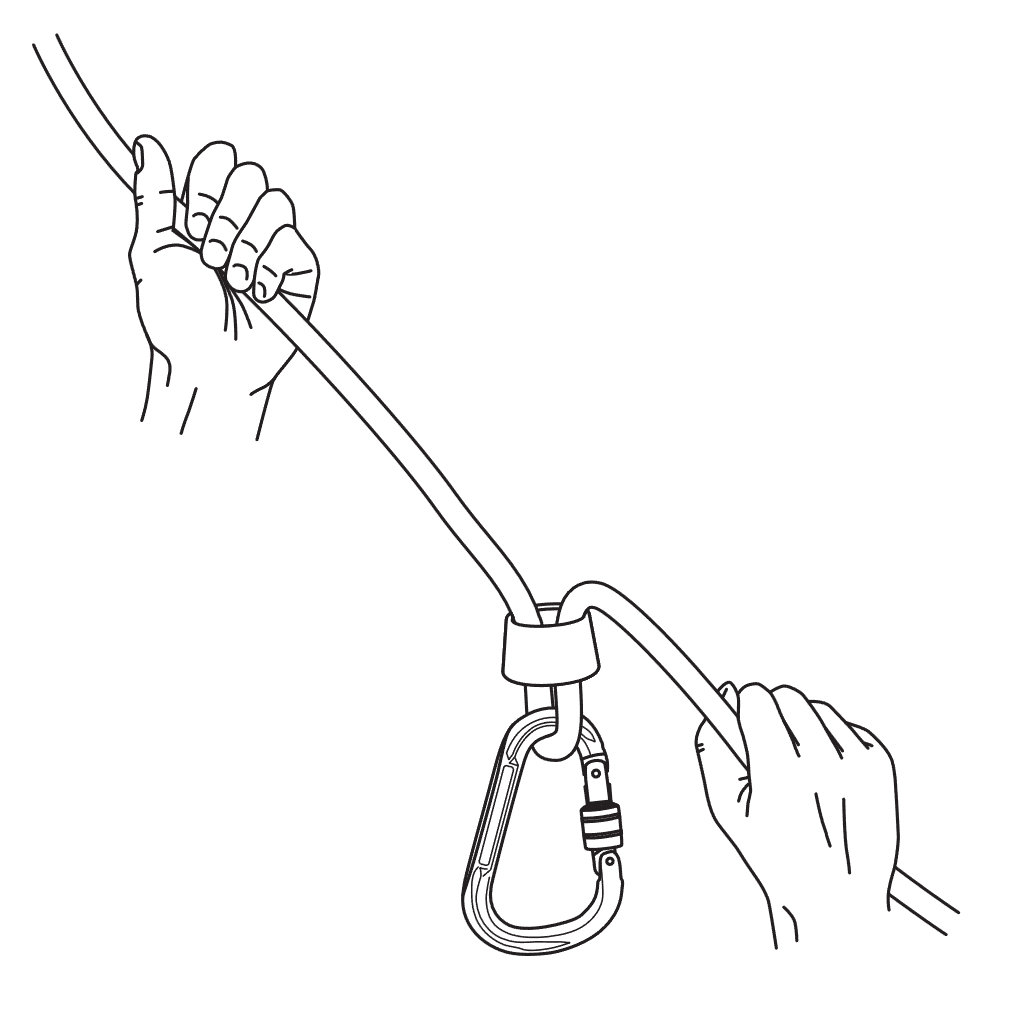
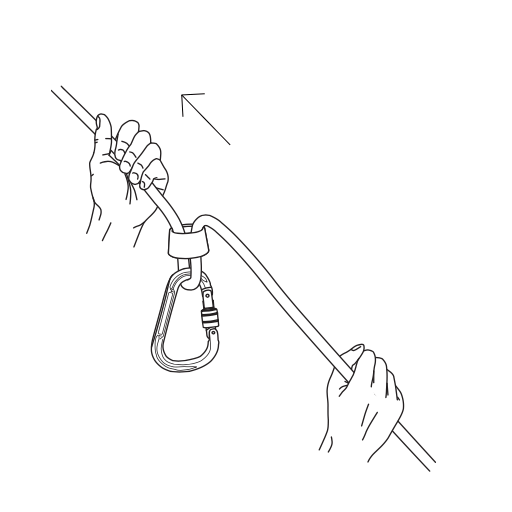
1. starting point.
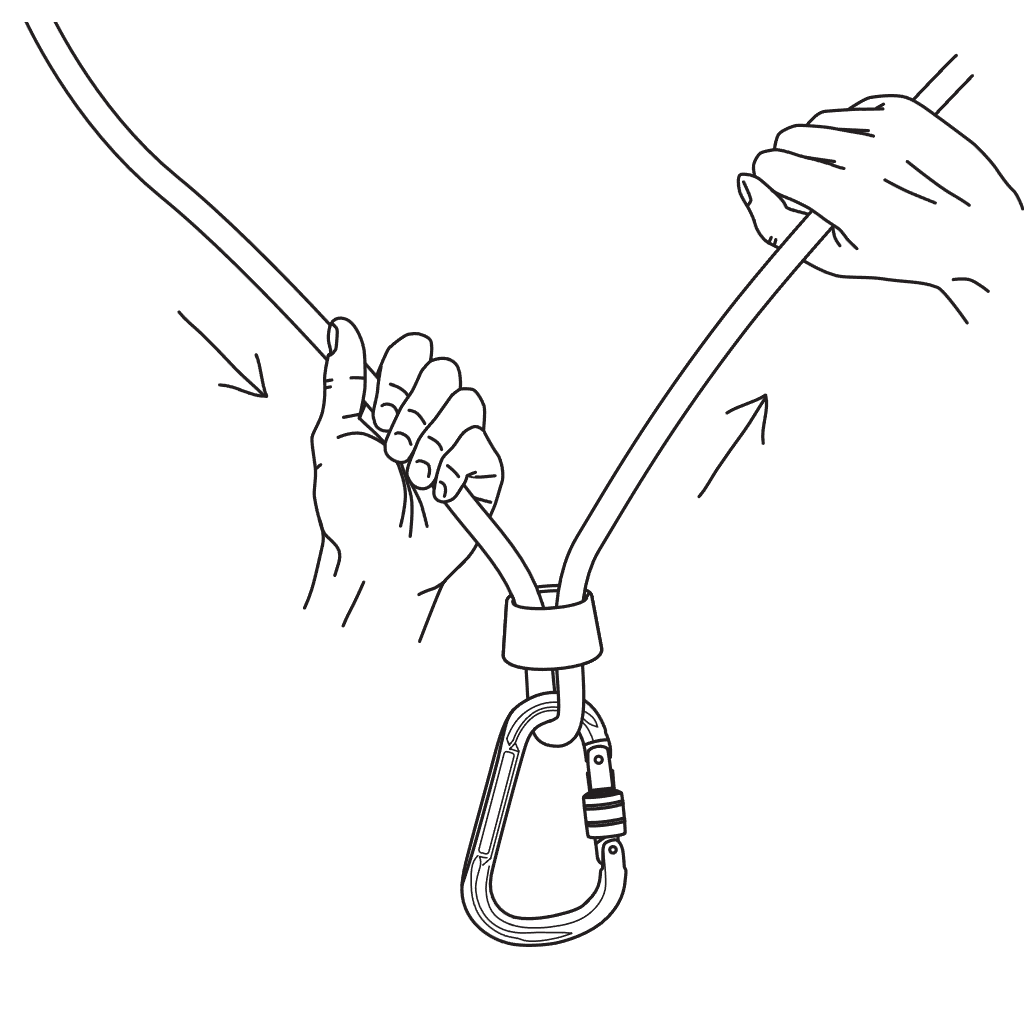
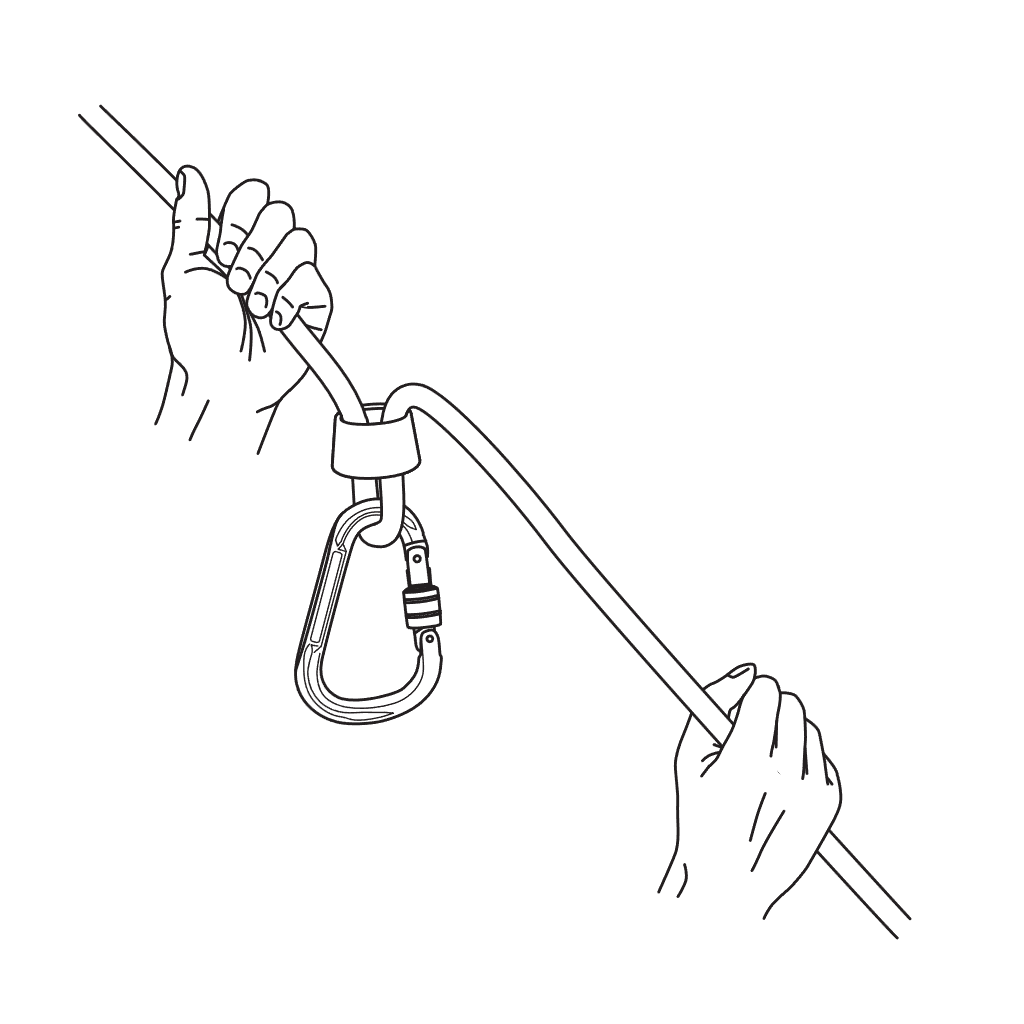
2. Bring the rope home. The brake hand pulls upwards while the upper hand helps downwards.
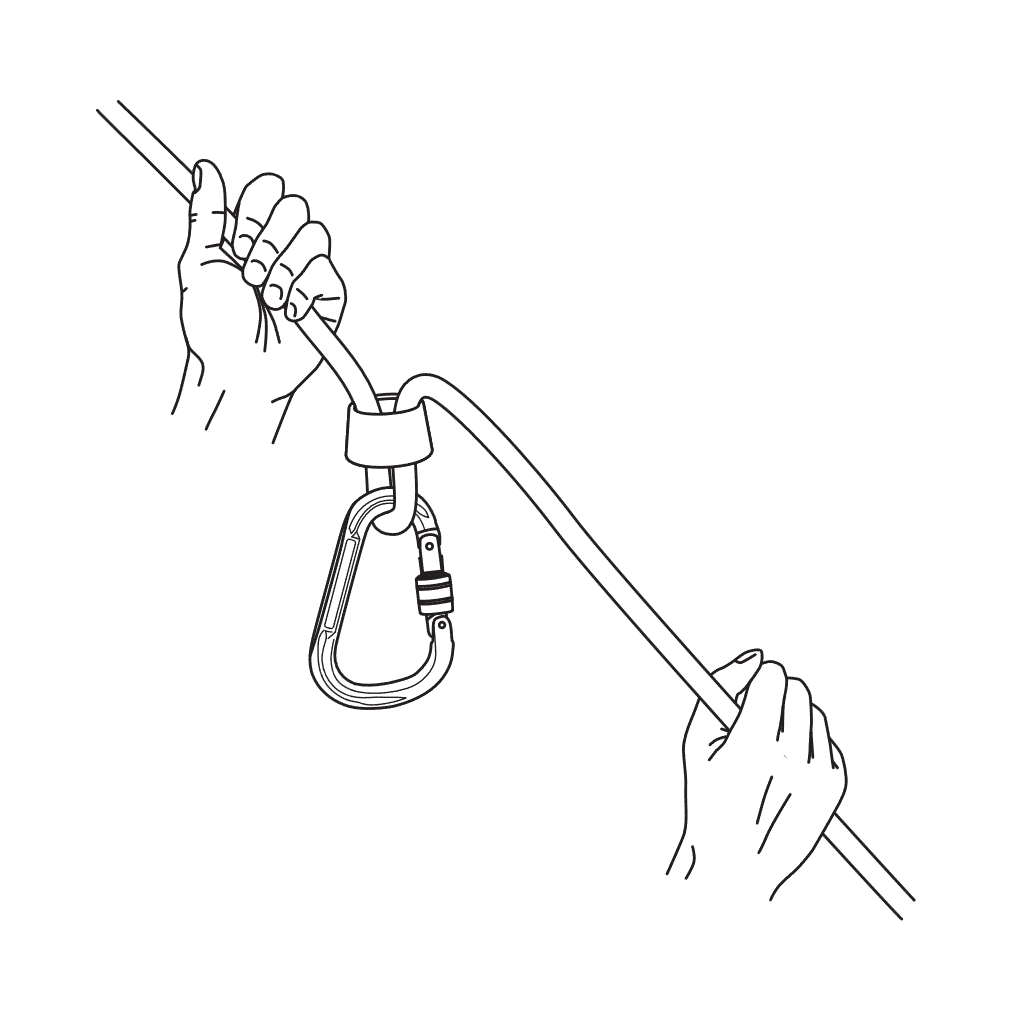
3. locked position. The brake hand is at the hip.
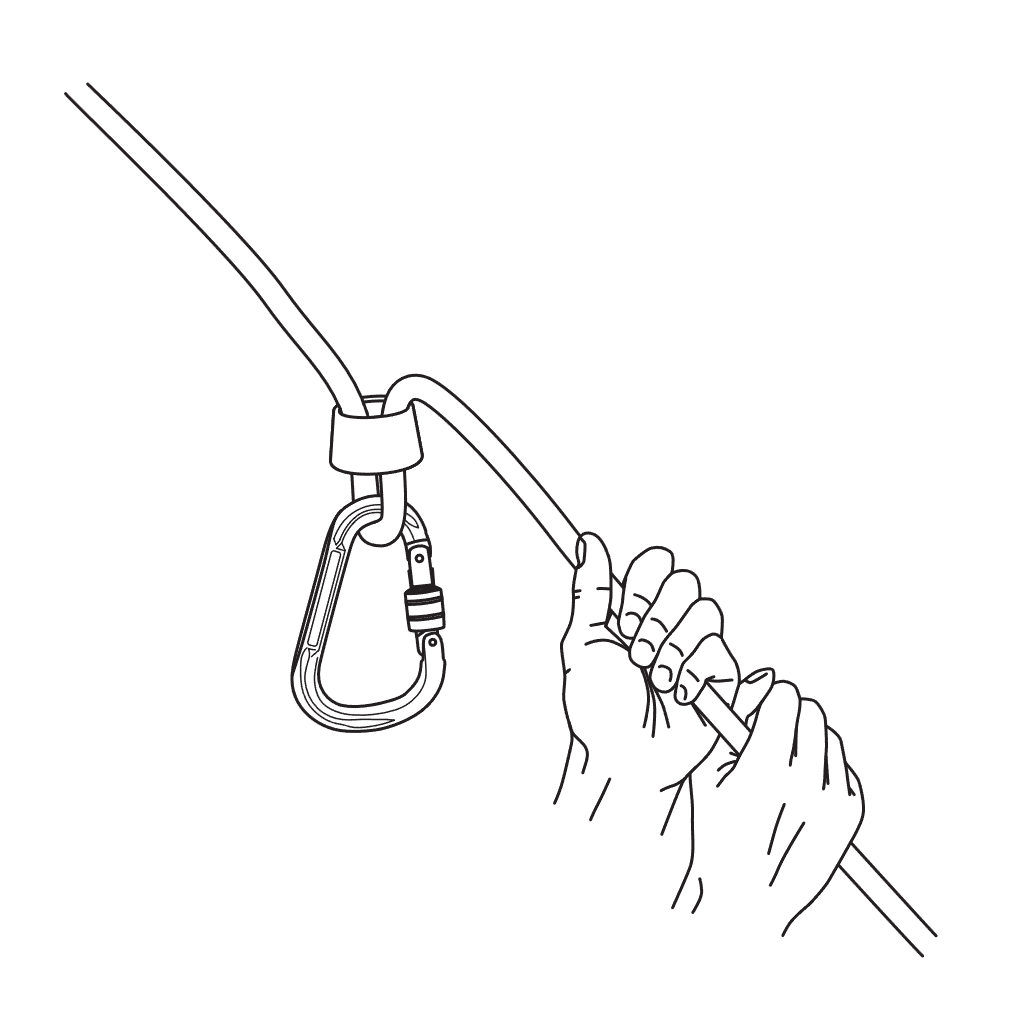
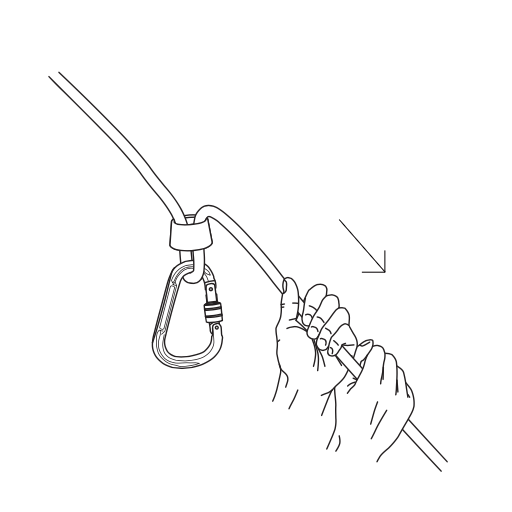
4. Move your upper hand down and grasp the rope just above the brake hand. Keep your upper hand at least 10 cm from the brake.
5. Move the brake hand up so that it is on top. Always keep your hands at least 10 cm from the brake.
6. you are now back in the starting position.
Never let go of the passive end of the rope!
Wire fuse
This is the most important part of the course. With a well and correctly practiced belay technique, the climber can feel safe and you can relax and concentrate on the climber instead of keeping your eyes on the brake all the time. However, get into the habit of looking down at the brake and carabiner from time to time. For example, the carabiner may rotate at times and should be fixed in that case.
You should practice the belay procedure under the supervision of a trained instructor until you feel completely confident in its execution. If the climber falls and you are unable to belay properly, a serious accident may occur. Never compromise on safety.
There must always be a hand on the rope under the brake. If in any situation you feel unsure of what you are doing, lock the rope with your braking hand on your hip as in Figure 3. In this position the climber is safe and you can ask someone for help or continue with the belay again when you feel ready. Also keep in mind that the hand should be at least 10 cm from the brake in all positions. This is to avoid the risk of pinching.
Lead securing step by step
1. to release the rope, move your
upper hand down and grasp the rope just
above the brake hand. Keep the
upper hand at least 10 cm from the
brake.
2. move the primary brake hand downwards while maintaining a firm grip on the rope.
3. Move the secondary brake hand up above the brake and pull the rope through the brake. Keep the primary brake hand at least 10 cm from the brake.
Never let go of the passive end of the rope!
Spotting
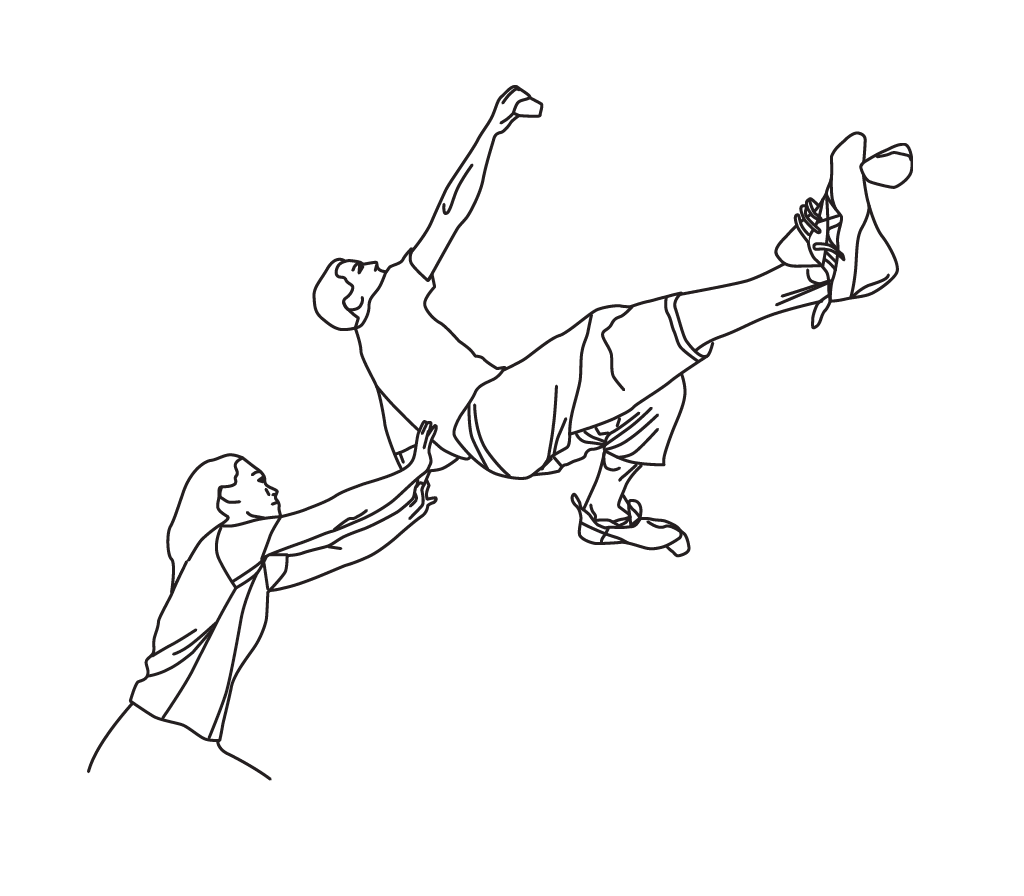
Spotting is a technique used when there is a risk of falling to the ground, e.g. bouldering and lead climbing up to the first bolt. The climber is spat at by a person on the ground.
The spotter's task is not to catch the climber by hand, but to cushion and guide a possible fall, so that the climber does not fall handless and hit his head, for example.
Remember not to spread your fingers when spitting, but cup your hands like spoons. This will reduce the risk of broken fingers.